MiniWerks

Fine Handbuilt Models from around the World

Latest Models

Lexus LFA Tokyo Motor Show 2009 Whitest White

Lexus LFA Tokyo Motor Show 2009 Whitest White

One Only! Lexus LFA Tokyo Motor Show 2009 Whitest White. Limited edition #39/80 as shown. Brand new.

» See more...

Welcome to MiniWerks Online!

The focus here is representing high–end 1/43 scale handbuilt models from the World’s top brands, as well as pieces from internationally renowned independent builders.

Mike McCormick signature

MiniWerks Forum
Home | Profile | Register | Active Topics | Members | Search | FAQ
 All Forums
 General
 1/43 scale Handbuilt Models
 Applying decals

Note: You must be registered in order to post a reply.
To register, click here. Registration is FREE!

Screensize:
UserName:
Password:
Format Mode:
Format: BoldItalicizedUnderlineStrikethrough Align LeftCenteredAlign Right Horizontal Rule Insert HyperlinkInsert EmailInsert Image Insert CodeInsert QuoteInsert List
   
Message:

* HTML is OFF
* Forum Code is ON


T O P I C    R E V I E W
Sam S. Posted - 01/31/2022 : 19:40:13
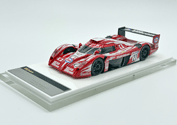
I recently bought a 1/43 MakeUp model based on real car, and included was a pair of decals for the rear flanks, as apparently the real car didn't initially have them. I used to assemble models in my youth, and applying decals was a simple matter of soaking and placing decals. However, from watching a few tutorials there are now all sorts of solutions to apply before and/or after.

The decals in question won't be placed over gaps, but will be on a curved surface. I'm unclear whether using any of the various solutions will mar or cause a mismatch with the existing paint finish.

Any tips?

MiniWerks :: Fine Handbuilt Models from around the World :: Contact MiniWerks :: MiniWerks on eBay © 2014 Mike McCormick. All rights reserved   Go To Top Of Page
 
Snitz Forums 2000