| Author |
 Topic Topic  |
|
Ferrarinut
USA
1489 Posts |
 Posted - 11/14/2012 : 16:29:17 Posted - 11/14/2012 : 16:29:17


|
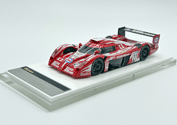
Jean-Paul has started a new series for Miniwerks, his comments and WIP photos to follow. I will post updates as I receive them. Enjoy!
From Jean-Paul
Our new serie will be based on the recently issued Esprit43 kit of the GTO 64. The kit can build 4 versions and the chosen one is the winning car at the 2000 Km Daytona Continental in 1964, chassis #5571GT. It is seen here on the banking with the Cobra Coupe.
 |
|
|
Ferrarinut
USA
1489 Posts |
 Posted - 11/14/2012 : 16:30:11 Posted - 11/14/2012 : 16:30:11


|
The winners, Phil Hill and Pedro Rodriguez on the podium with a spectacular trophy and Miss Universe.
 |
 |
|
|
Ferrarinut
USA
1489 Posts |
 Posted - 11/14/2012 : 16:33:33 Posted - 11/14/2012 : 16:33:33


|
The main parts of the kit.
 |
 |
|
|
Ferrarinut
USA
1489 Posts |
 Posted - 11/14/2012 : 16:34:12 Posted - 11/14/2012 : 16:34:12


|
The photo-etched parts with the specific sheet for this version with the roof’s wing.
 |
 |
|
|
Ferrarinut
USA
1489 Posts |
 Posted - 11/14/2012 : 16:36:49 Posted - 11/14/2012 : 16:36:49


|
A very complete decal sheet with the markings for the tires.
 |
 |
|
|
Ferrarinut
USA
1489 Posts |
 Posted - 11/14/2012 : 16:37:40 Posted - 11/14/2012 : 16:37:40


|
The bodies have been cleaned and all holes drilled. Before the first coat of paint, some photo-etched parts must be glued, the roof’s wing, the skirt for the bottom of the rear part and the strips for the rear wings vents.
 |
 |
|
|
Ferrarinut
USA
1489 Posts |
 Posted - 11/14/2012 : 16:39:48 Posted - 11/14/2012 : 16:39:48


|
At this stage, some putty has been added to fill a few porosity holes and to make a perfect join between the body and the photo-etched wing of the roof.
 |
 |
|
|
Ferrarinut
USA
1489 Posts |
 Posted - 11/14/2012 : 16:40:33 Posted - 11/14/2012 : 16:40:33


|
After careful sanding, one primer coat and one red base coat, the bodies did receive their last coat of varnish.
 |
 |
|
|
Ferrarinut
USA
1489 Posts |
 Posted - 11/14/2012 : 16:43:00 Posted - 11/14/2012 : 16:43:00


|
After a short time in the oven, we’ll let the paint harden before polishing. In the meantime we’ll take care of the interior parts and the chassis, preparation and painting. See you in a few days.

 |
 |
|
|
Ferrarinut
USA
1489 Posts |
 Posted - 11/26/2012 : 19:40:38 Posted - 11/26/2012 : 19:40:38


|
The main interior parts have been painted.
 |
 |
|
|
Ferrarinut
USA
1489 Posts |
 Posted - 11/26/2012 : 19:41:51 Posted - 11/26/2012 : 19:41:51


|
Assembly of the dashboard, each instrument decal is carefully cut to fit properly in his place. Also note the nice reproduction of the fuse-box.
 |
 |
|
|
Ferrarinut
USA
1489 Posts |
 Posted - 11/26/2012 : 19:45:25 Posted - 11/26/2012 : 19:45:25


|
The tires are ready to be used. Contrary to the previous version of the Esprit43 GTOs whose building process you could follow on this forum, the wheels here are silver painted. Same process otherwise, one clear coat of varnish on the tires so that the decals adhere perfectly, then we can apply the decals and a final coat of matt varnish when they are dry.
 |
 |
|
|
Ferrarinut
USA
1489 Posts |
 Posted - 11/26/2012 : 19:46:32 Posted - 11/26/2012 : 19:46:32


|
After the bodies have received some detail, painting of the windscreen surround and wings vents, the vacform parts have been added. Time now to put the decals, each motif is cut separately to suppress the non really attractive varnish surround.
 |
 |
|
|
Ferrarinut
USA
1489 Posts |
 Posted - 12/01/2012 : 08:13:38 Posted - 12/01/2012 : 08:13:38


|
Bodies and chassis have been put together, the wheels glued and all the last accessories found their place on the body; this is the end of our building process.
 |
 |
|
|
Ferrarinut
USA
1489 Posts |
 Posted - 12/01/2012 : 08:14:37 Posted - 12/01/2012 : 08:14:37


|
Note the reinforcement bars for the windscreen and the masking of the front lights with the wrinkles to reproduce the car as it was at the beginning of the race.
 |
 |
|
|
Ferrarinut
USA
1489 Posts |
 Posted - 12/01/2012 : 08:19:14 Posted - 12/01/2012 : 08:19:14


|
Once again thank-you to Mike Craig for creating such wonderful kits, it’s always a real pleasure to build them!

 |
 |
|
 Topic Topic  |
|
