MiniWerks

Fine Handbuilt Models from around the World

Latest Models

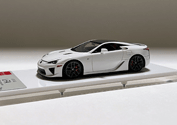
Lexus LFA Tokyo Motor Show 2009 Whitest White

Lexus LFA Tokyo Motor Show 2009 Whitest White

One Only! Lexus LFA Tokyo Motor Show 2009 Whitest White. Limited edition #39/80 as shown. Brand new.

» See more...

Welcome to MiniWerks Online!

The focus here is representing high–end 1/43 scale handbuilt models from the World’s top brands, as well as pieces from internationally renowned independent builders.

Mike McCormick signature

MiniWerks Forum
Home | Profile | Register | Active Topics | Members | Search | FAQ
Username:
Password:
Save Password
 All Forums
 General
 1/43 scale Handbuilt Models
 Ferrari 250 GTO 3527 GT Graber Modified
 New Topic  Reply to Topic
 Printer Friendly
Previous Page | Next Page
Author Previous Topic Topic Next Topic
Page: of 3

PeterW

USA
1216 Posts

Posted - 12/27/2011 :  13:17:21  Show Profile  Visit PeterW's Homepage  Reply with Quote
The gauge cluster assembly is modified to fit the dash better. It will be painted black and paint will then be removed from each gauge surround.


The steering wheel center is sanded and then polished with a buffer.


The two photo etched wheel rim sections are painted on one side only and set on wax paper to dry. This will create a profile when they are attached to the polished center. The centers edge will also be visible this way as it is on the real steering wheel. You can see the half round shape the paint creates that will mimic the real thing.


Leather is fitted to the center of the seats. To keep things in scale the whole seat is then painted along with the leather insert.


Edited by - PeterW on 12/27/2011 15:00:52
Go to Top of Page

PeterW

USA
1216 Posts

Posted - 12/28/2011 :  13:26:30  Show Profile  Visit PeterW's Homepage  Reply with Quote
Wheel center/shaft is re-made in machined aluminum [cast version from the kit is on the left]and the steering wheel is assembled and added to the completed dash. I am happy with the steering wheel assembly. It looks much more realistic to me.


Creating the Scuderia badge decal was accomplished by scanning the artwork from the book cover on to a white decal film and each will be carefully trimmed off and applied to the model.


Edited by - PeterW on 12/28/2011 15:20:37
Go to Top of Page

PeterW

USA
1216 Posts

Posted - 12/29/2011 :  13:33:16  Show Profile  Visit PeterW's Homepage  Reply with Quote
Moving into the final stretch on the first 3 models. The presentation will allow the customer to display it with or without the valve spring, which is from the actual car after an engine service.


Test fit of the car on it's wheels and the clear coat applied to the body. Temperatures have dropped here in Florida so more time will be needed before attempting to polish the paint. Note the blue tint on the wheels and the polished edges...just as they appeared on the original. The front wheels will require some more adjustment to get them just right in the wheel well.


The interior is clad in tan leather. The windows were manual and had leather door cards with map pockets. The headliner and rear seat/deck were also tan leather. I have used very thin leather and dyed it tan for this model. Note the window frames. They are polished metal as opposed to paint. I find this much more elegant then paint.


More interior components are dry fitted. Note how realistic the steering wheel appears using the 3 piece photo etch provided in the kit.


The stock wheel knock offs are replaced with photo etched parts from the kit. Valve stems will be added at the very end of assembly. The paint tends to look slightly heavy at this stage. Final wet sanding and polishing will scale it back down and give the paint a more natural appearance.


Edited by - PeterW on 12/31/2011 11:01:54
Go to Top of Page

Blanchimont

Belgium
85 Posts

Posted - 12/29/2011 :  23:04:00  Show Profile  Reply with Quote
This is a real collectors item. Craftsmanship is the right word.
Well done Peter.
There is an empty space in my cabinet.............
Also thanks to Don for the co-operation.
Go to Top of Page

250GTE

Netherlands
295 Posts

Posted - 12/30/2011 :  14:21:01  Show Profile  Reply with Quote
What can I say? Amazing work. Perhaps I'll have to start saving and make purchasing one of these babies a newyears resolution.
Go to Top of Page

914joe

USA
206 Posts

Posted - 12/30/2011 :  18:55:36  Show Profile  Reply with Quote
Nice!!! I like the window frame treament. It's more work but has a much better effect.
Go to Top of Page

PeterW

USA
1216 Posts

Posted - 01/01/2012 :  12:04:09  Show Profile  Visit PeterW's Homepage  Reply with Quote
quote:
Originally posted by 914joe

Nice!!! I like the window frame treament. It's more work but has a much better effect.


Thanks Joe. The window frames on these kits are polished and then as I go through each phase of paint I apply a very thin layer of leather honey to the frame so the paint won't stick. After I have finished the base paint I clear coat the whole body and this also protects the polished metal from tarnishing later on.
Go to Top of Page

PeterW

USA
1216 Posts

Posted - 01/01/2012 :  12:07:54  Show Profile  Visit PeterW's Homepage  Reply with Quote
quote:
Originally posted by 250GTE

What can I say? Amazing work. Perhaps I'll have to start saving and make purchasing one of these babies a newyears resolution.


Thanks! Contact Mike if you want one. Number 3 of 6 will be available later next week.
Go to Top of Page

PeterW

USA
1216 Posts

Posted - 01/02/2012 :  11:00:30  Show Profile  Visit PeterW's Homepage  Reply with Quote
Wet sanding the model. Note the high spots that will need to be leveled by sanding. Care must be taken as I move over the body in only two perpendicular directions. Starting with a 1000 grit, followed by a 4000, 8000 and finally a 12000. This will remove most of the scratches left by the initial sanding.


Once the entire body is level and flat I move on to the buffing.


You can see the scratches left by the wet sanding and the direction.


I use a 3M automotive product that cuts and polishes removing all of the marks. Using a buffing wheel can be risky but using extreme care it yields the best possible results. This is similar to the way a full size car would be done using the same product.


After a good buffing the material not only removes all of the scratches but also leaves it with a nice polished gloss.


The finished product will receive a hand glaze to enhance the finish and protect it from fingerprints.


Interior just prior to joining up with the body. It was relatively simple in it's color scheme with tan leather and tan carpet. Note the speedo installed by the shifter...unique to this car. The headliner was also tan leather and it is featured on this model.


Edited by - PeterW on 01/02/2012 14:35:02
Go to Top of Page

360driver

Netherlands
454 Posts

Posted - 01/02/2012 :  12:14:22  Show Profile  Reply with Quote
WOW! amazing job! really shiny!
Go to Top of Page

PeterW

USA
1216 Posts

Posted - 01/02/2012 :  15:42:31  Show Profile  Visit PeterW's Homepage  Reply with Quote
The model is now starting to come together. This is number 1 of 6. At this point I will mount the model to a small temporary base to add the final details. Then it will be transferred back to it's presentation base permanently.


Go to Top of Page

PeterW

USA
1216 Posts

Posted - 01/03/2012 :  09:44:21  Show Profile  Visit PeterW's Homepage  Reply with Quote
Each of the bumperettes is hand shaped out of white metal and polished with a Q tip.


And the final detail is a machined and polished fender mounted mirror.


Edited by - PeterW on 01/03/2012 14:38:58
Go to Top of Page

dark star

Spain
413 Posts

Posted - 01/03/2012 :  15:02:24  Show Profile  Reply with Quote
Bravo, Peter.
Very well done !!!
A truly masterpiece,with all little details, as the Volkswagen Transporter rear ligts !.

Cheers.

jerry
Go to Top of Page

Blanchimont

Belgium
85 Posts

Posted - 01/03/2012 :  20:23:38  Show Profile  Reply with Quote
Fantastic Peter,
very well done.
A lot off work you did, a lot of respect you get.........
grtz from Belgium
Go to Top of Page

PeterW

USA
1216 Posts

Posted - 01/05/2012 :  12:14:41  Show Profile  Visit PeterW's Homepage  Reply with Quote
Thanks Guys!

3 sold so the last 3 are now under way.
Go to Top of Page
Page: of 3 Previous Topic Topic Next Topic  
Previous Page | Next Page
 New Topic  Reply to Topic
 Printer Friendly
Jump To:
MiniWerks :: Fine Handbuilt Models from around the World :: Contact MiniWerks :: MiniWerks on eBay © 2014 Mike McCormick. All rights reserved   Go To Top Of Page
 
Snitz Forums 2000