| T O P I C R E V I E W |
| PeterW |
Posted - 04/15/2012 : 09:26:22
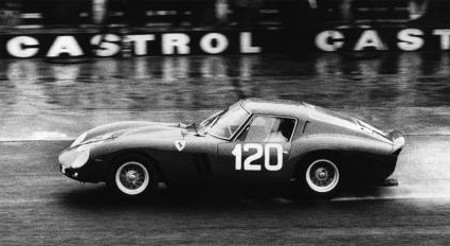
I am excited to start this new project. I will do both the Le Mans version [although it did not finish] and the Nurburgring version of Mike Parks that took first in it's class and second overall, the best performance for the car. One of each version is available as a curbside. Contact Mike for details. I am basing the series on the AMR Rep002 Nostalgia kit [still my favorite]and have pin-pointed some changes that will be made to the body to be as accurate as possible.

Here is some history and nice photos to absorb. The Cavallino article clarifies the fact that 3765 did indeed compete at the Nurburgring.
http://www.cavallino.com/3765article.html
http://www.cliffreuter.com/ferrari%20gto.htm
http://mydadsphotos.shendy.co.uk/motorsport/european-motorsport/nurburgring-1962/bw_c011_28/
|
| 15 L A T E S T R E P L I E S (Newest First) |
| PeterW |
Posted - 01/15/2013 : 07:05:56
Dry fit of the body to the chassis prior to final detailing. Glass is only dry fit at this stage in one piece. It will be divide up and installed flush once the "tweaking" of the chassis to body is completed.

The rear glass "vent" is vac formed in place on the early AMR kits. This feature will be re-worked on the final version.

The radiator flap will also be installed once the two are permanently joined together.

This model is available for purchase. Please contact Mike for details if interested. |
| PeterW |
Posted - 12/08/2012 : 17:54:40
quote:
Originally posted by AltitudeAvenger
Incredible work as always. What engine are you using?
Renaissance ENG2 Ferrari GTO V12 |
| AltitudeAvenger |
Posted - 12/08/2012 : 11:40:15
Incredible work as always. What engine are you using? |
| PeterW |
Posted - 12/07/2012 : 16:27:43
Fabricating the engine bay for the 4 litre "lump"

 |
| PeterW |
Posted - 11/30/2012 : 09:00:20
Assembly of the motor starts with a careful inventory of the parts…especially the injector stacks!
 |
| PeterW |
Posted - 11/18/2012 : 06:59:16
Updates and photos coming soon ;) |
| Blanchimont |
Posted - 11/17/2012 : 19:55:08
Hi Peter, how is this project going? |
| PeterW |
Posted - 07/20/2012 : 21:29:14
quote:
Originally posted by Ferrari2006
Hello Peter, do you polish the window frames?? or they are painted in silver?
Regards, from Stuttgart
Fred
In this case I polished the frames. I do both techniques depending on the condition of the castings...some are too rough to work with so they must be painted. |
| Ferrari2006 |
Posted - 07/20/2012 : 20:49:49
Hello Peter, do you polish the window frames?? or they are painted in silver?
Regards, from Stuttgart
Fred |
| Blanchimont |
Posted - 07/20/2012 : 13:56:58
Great clear coat finish as usual.
Well done Peter. |
| PeterW |
Posted - 07/20/2012 : 10:23:12
Clearcoat applied and it's just perfect! On to assembly of the first model.


 |
| Blanchimont |
Posted - 07/18/2012 : 08:29:49
Fantastic Peter.
|
| the.x.man |
Posted - 07/17/2012 : 23:30:21
Classy!!!
________________________________________________________
The only substitute for cubic inches is more cubic inches!
~ Max Balchowsky |
| PeterW |
Posted - 07/17/2012 : 21:55:32
My new plaques are finished. Nickel Silver and Black. These will now take the place of the PLM-Studio plaques on my 6x6 presentation bases.
[photo from the manufacturer].
 |
| PeterW |
Posted - 07/17/2012 : 18:57:14
Final mods are complete and the base coat of paint and decals applied. Once the decals are fully dry the D flap portion of the nose decal will be carefully removed and transferred to the pe part. The flap will be operable along with the hood [bonnet]. Of course the model will boast a detailed engine bay.
Whenever the casting allows I prefer to polish the window frames as I did in this case.


 |
