MiniWerks

Fine Handbuilt Models from around the World

Latest Models

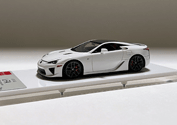
Lexus LFA Tokyo Motor Show 2009 Whitest White

Lexus LFA Tokyo Motor Show 2009 Whitest White

One Only! Lexus LFA Tokyo Motor Show 2009 Whitest White. Limited edition #39/80 as shown. Brand new.

» See more...

Welcome to MiniWerks Online!

The focus here is representing high–end 1/43 scale handbuilt models from the World’s top brands, as well as pieces from internationally renowned independent builders.

Mike McCormick signature

MiniWerks Forum
Home | Profile | Register | Active Topics | Members | Search | FAQ
Username:
Password:
Save Password
 All Forums
 General
 1/43 scale Handbuilt Models
 Ferrari 250 GTO 1964 Pebble Beach 2011
 New Topic  Reply to Topic
 Printer Friendly
Next Page
Author Previous Topic Topic Next Topic
Page: of 2

PeterW

USA
1216 Posts

Posted - 11/20/2011 :  12:17:56  Show Profile  Visit PeterW's Homepage  Reply with Quote
Here's my next project heading Mike's way...as featured in this years Pebble Beach. The model is based on the newly released Esprit43 kit. On each of chassis number 4091 and 5575 are being made.


The first step is to mark up the areas to be modified. Shorten the roof and remove the hood bulge.


Then it gets clamped to the milling table for the initial cut. This needs to be perfectly strait. I will continue on the work bench by hand.


Edited by - PeterW on 11/29/2011 14:04:09

PeterW

USA
1216 Posts

Posted - 11/21/2011 :  14:08:56  Show Profile  Visit PeterW's Homepage  Reply with Quote
Chassis 4091 requires milling of the roof. As you can see in the detail photo it is flattened in the center and actually tapers back to the spoiler. Care must be taken not to ruin the roof in the process so extreme care is taken removing a small amount of material at a time. As you can see it has a crater in one area due to the nature of the casting.


Roof of chassis 4091.


Edited by - PeterW on 11/29/2011 14:24:26
Go to Top of Page

PeterW

USA
1216 Posts

Posted - 11/28/2011 :  11:12:40  Show Profile  Visit PeterW's Homepage  Reply with Quote
The roof of chassis 4091 is reinforced with brass sheet soldered in place. This will allow me to keep the profile as thin as possible to facilitate the rear roof wing.


Putty is applied to finish off the base of the roof prior to adding the rear roof wing/spoiler.


Brass insert for roof wing in dry fit.


Roof "wings" soldered in place.


Edited by - PeterW on 11/29/2011 14:22:24
Go to Top of Page

PeterW

USA
1216 Posts

Posted - 11/30/2011 :  14:52:57  Show Profile  Visit PeterW's Homepage  Reply with Quote
Modifications continue...chop, chop!


A bit more surgery is required on 4091...this section of roof will be removed in addition to some detail "sculpting" before the roof is correct.


Edited by - PeterW on 11/30/2011 16:19:51
Go to Top of Page

ferrari10flrb

Netherlands
91 Posts

Posted - 12/01/2011 :  02:56:29  Show Profile  Visit ferrari10flrb's Homepage  Reply with Quote
Great piece of work, I am jealous of these skills.

The #24 250 GTO 1964 is a model which I am looking for to replace my Jouef model.

As far is I know this #24 is not made by many.

I am curious of the results.

http://dcasasferraricollectie.come2me.nl/
Go to Top of Page

PeterW

USA
1216 Posts

Posted - 12/01/2011 :  08:19:31  Show Profile  Visit PeterW's Homepage  Reply with Quote
quote:
Originally posted by ferrari10flrb

Great piece of work, I am jealous of these skills.

The #24 250 GTO 1964 is a model which I am looking for to replace my Jouef model.

As far is I know this #24 is not made by many.

I am curious of the results.

http://dcasasferraricollectie.come2me.nl/


Yes, Jouef didn't get it quite right ...roof has a seam and the shape is off. Exhaust pipe exits from the rear and they should be out the sides, at least that is how it appeared at Pebble Beach.

More photos of the car here:

http://www.supercars.net/gallery/119513/2697/4.html

And just for giggles these guys decided to make a "hybrid" version. A scoop and a roof spoiler!

http://www.amazon.com/Ferrari-1964-Mans-Hours-Scale/dp/B001C0L8JO

Edited by - PeterW on 12/01/2011 08:34:20
Go to Top of Page

PeterW

USA
1216 Posts

Posted - 12/06/2011 :  13:51:12  Show Profile  Visit PeterW's Homepage  Reply with Quote
Epoxy putty is now applied in the areas that will be "sculpted" to replicate the hand made parts on the cars.


Go to Top of Page

PeterW

USA
1216 Posts

Posted - 01/27/2012 :  10:12:10  Show Profile  Visit PeterW's Homepage  Reply with Quote
I am getting this project wrapped up this week. I have now applied the first clear coat which will be baked dry, wet sanded and a final clear will be applied.

Go to Top of Page

PeterW

USA
1216 Posts

Posted - 01/27/2012 :  18:46:11  Show Profile  Visit PeterW's Homepage  Reply with Quote
Setting the displays up with some simple dry fits of the two versions. It really pays off to spend the time to scribe the panel lines deeper as it helps maintain the contrast against the paint.


The car won't sit quite so low as this is only a dry fit to see how the model will contrast with the base.


On the cn 4091 version the exhaust exits from the rear. The pipes were fabricated out of brass rod and the tips from the 62 GTO kit are used.


Go to Top of Page

PeterW

USA
1216 Posts

Posted - 01/27/2012 :  18:55:03  Show Profile  Visit PeterW's Homepage  Reply with Quote
The interior is coming together...some additional details will be added to the lower portion of the dash. The top of the dash is treated with a special texture paint.

Go to Top of Page

PeterW

USA
1216 Posts

Posted - 01/27/2012 :  19:06:44  Show Profile  Visit PeterW's Homepage  Reply with Quote
Some good photos of 4091 here:

http://www.gtspirit.com/2011/07/14/photo-of-the-day-ferrari-250-gto/?pid=31717&gallery=2838#tp
Go to Top of Page

250GTE

Netherlands
295 Posts

Posted - 01/28/2012 :  02:58:08  Show Profile  Reply with Quote
Incredible stuff. Seems like you work very accurately but at a high pace as well.
Go to Top of Page

PeterW

USA
1216 Posts

Posted - 01/28/2012 :  20:56:59  Show Profile  Visit PeterW's Homepage  Reply with Quote
At this stage the paint on both versions has been wet sanded and polished. I have also completed the displays and try another dry fit of the model to see how they will look before I move on to the final details.


Go to Top of Page

Blanchimont

Belgium
85 Posts

Posted - 01/29/2012 :  09:09:18  Show Profile  Reply with Quote
These models are looking great. Another lay-out but still a typical PLM look.
Also the paint finish is remarkably.
Well done.
Go to Top of Page

ferrari10flrb

Netherlands
91 Posts

Posted - 01/30/2012 :  05:02:12  Show Profile  Visit ferrari10flrb's Homepage  Reply with Quote
Great piece of work!!!

http://dcasasferraricollectie.come2me.nl/
Go to Top of Page

ferrariboy

Belgium
111 Posts

Posted - 01/30/2012 :  11:09:58  Show Profile  Visit ferrariboy's Homepage  Reply with Quote
would i could make such beauty's
i am buzzy with a testa rossa but there is now a little bit to much varnish on it , is it possible to grind a little bit away from it with sandpaper?

Ferrari is the best
Go to Top of Page
Page: of 2 Previous Topic Topic Next Topic  
Next Page
 New Topic  Reply to Topic
 Printer Friendly
Jump To:
MiniWerks :: Fine Handbuilt Models from around the World :: Contact MiniWerks :: MiniWerks on eBay © 2014 Mike McCormick. All rights reserved   Go To Top Of Page
 
Snitz Forums 2000